
In this version we included a Class D amp for non audiophiles who just want a single Box solution. We also have options for Class AB Amp, we used Class D to figure out the economics.
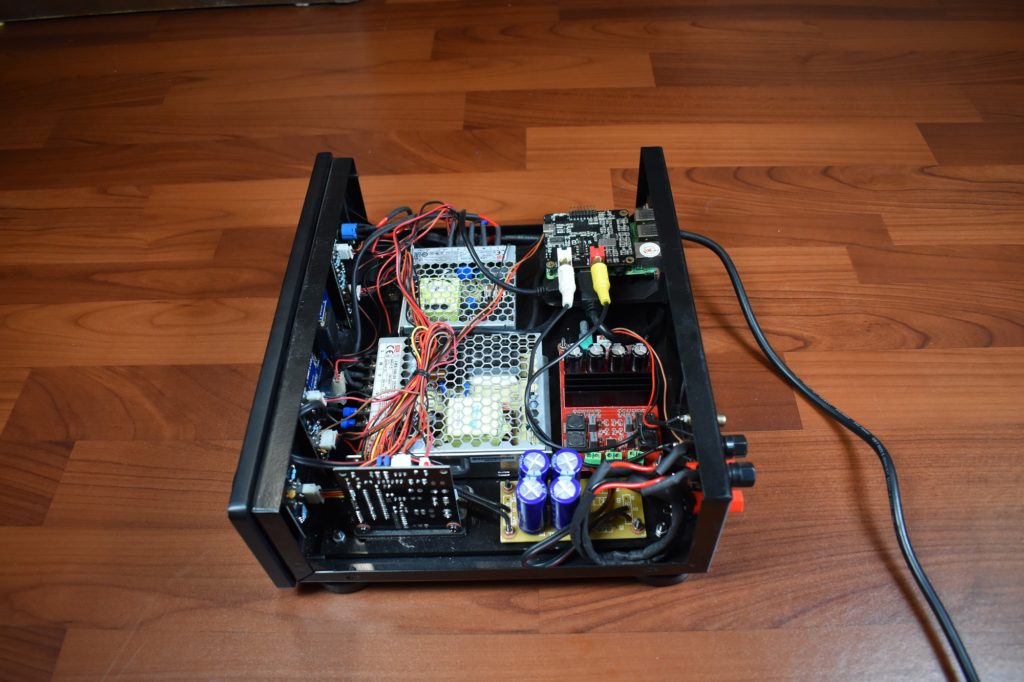
In this version we included a Class D amp for non audiophiles who just want a single Box solution. We also have options for Class AB Amp, we used Class D to figure out the economics.
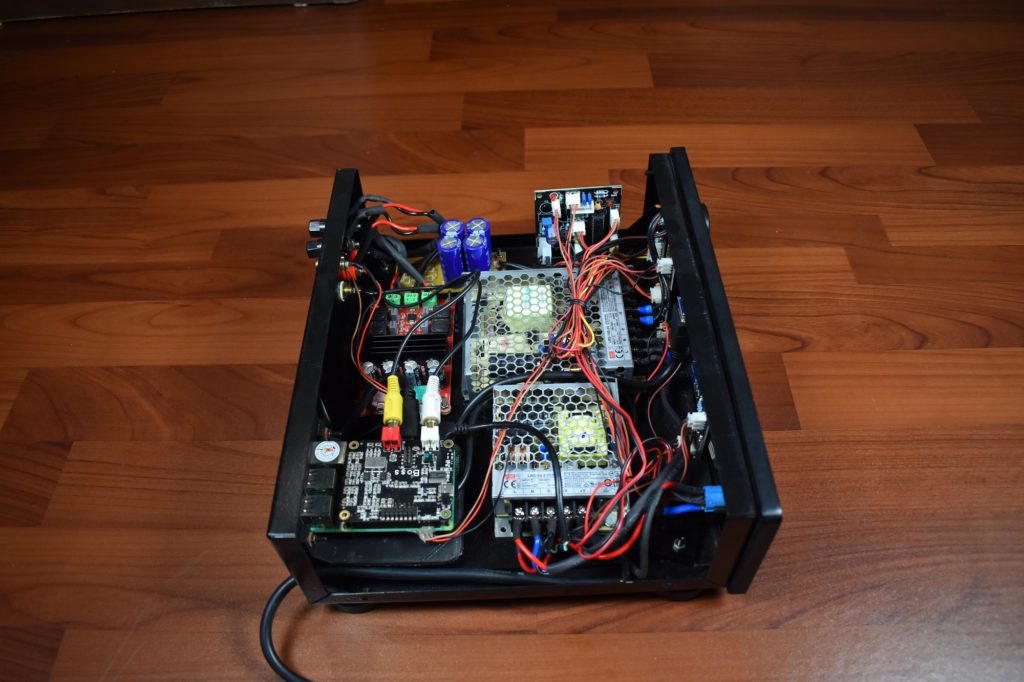
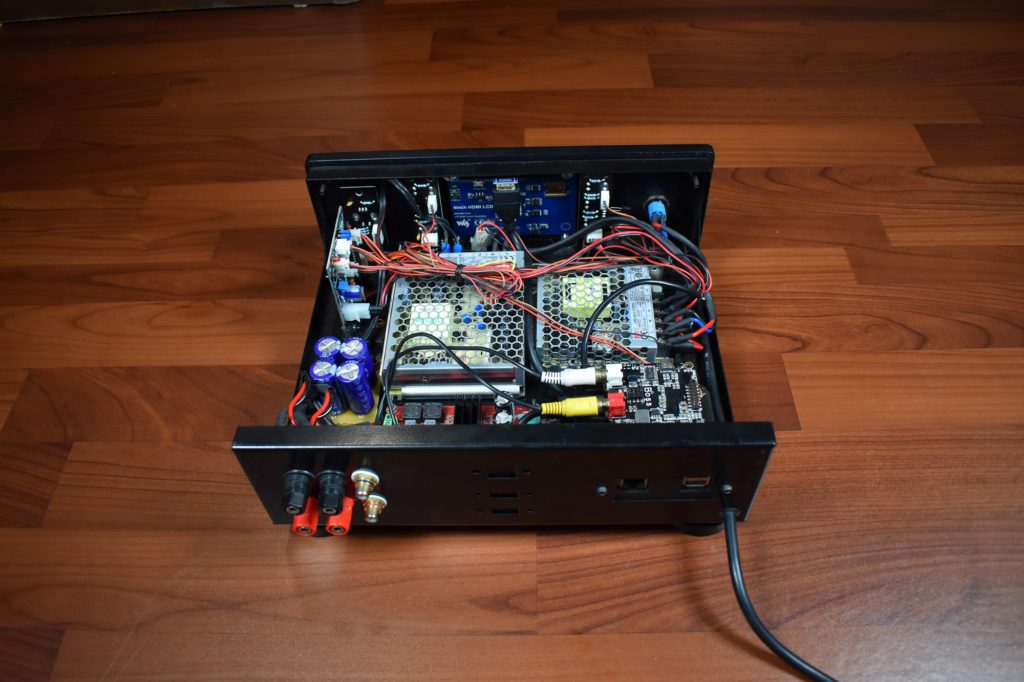
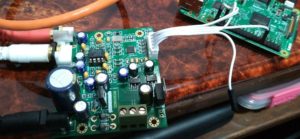
In this version we changed the layout a bit with a Dedicated LPSU for Preamp and DAC.
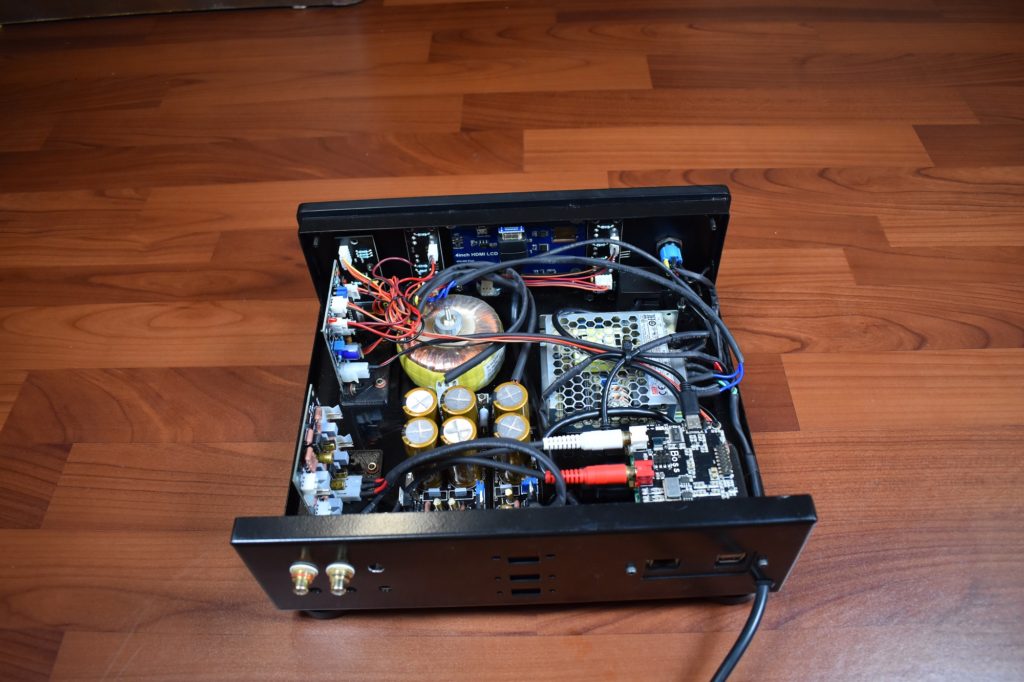
When we connected just the DAC to power amplifiers , we found that in some cases due to mismatches in impedances’ ,transparency was affected ,some frequencies were attenuated , noise and distortion were also noticed . To alleviate this issue we decided to add a PreAmp between the DAC and the Power amp. We also noticed that when we use the digital volume control in the DAC using the ALSA mixer the control was as smooth and detailed as using an analog volume pot.
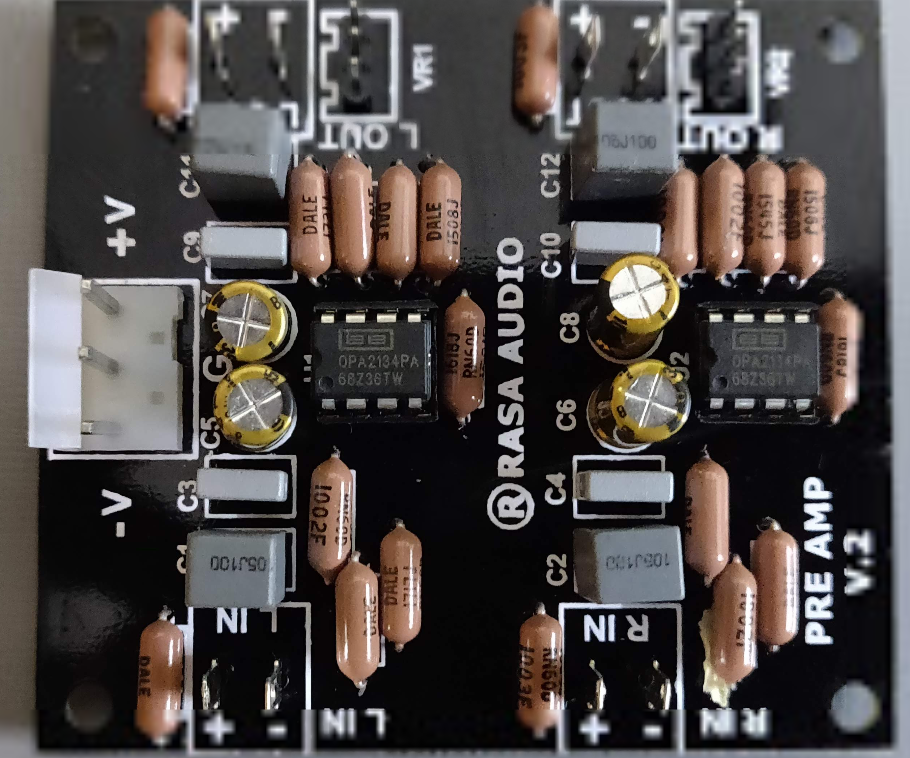
We are using two stage amplification using audiophile grade
Burr Brown OPA2134 opamp, resistors and capacitors . The first stage is a fixed gain stage which feeds to the pot this feed the second stage. Since it a dual mono stage we were able to achieve very low cross-talk.
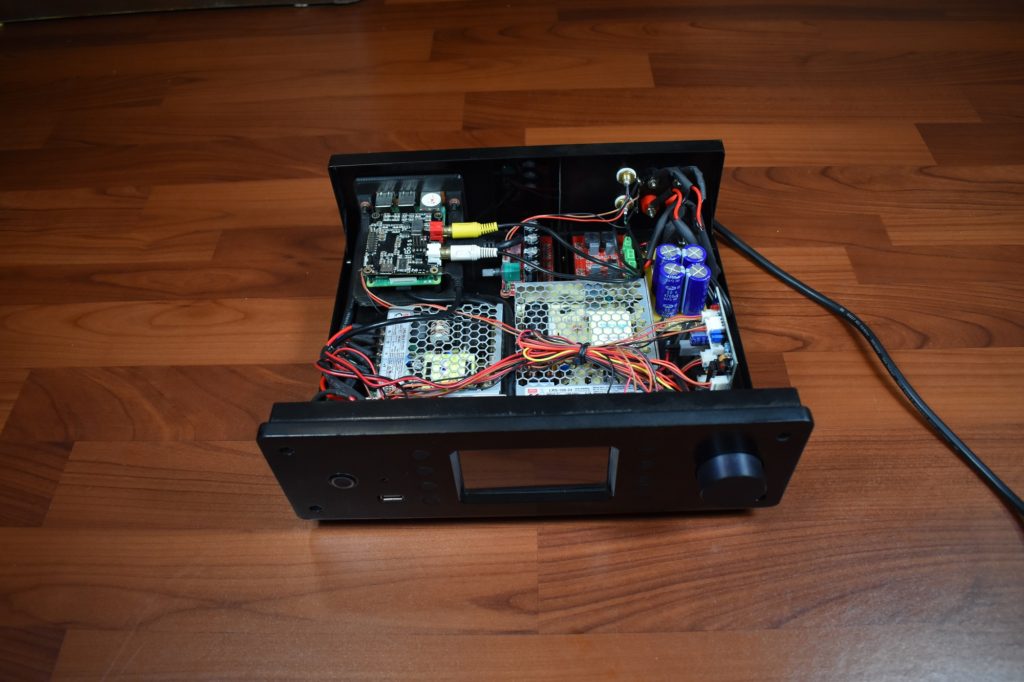
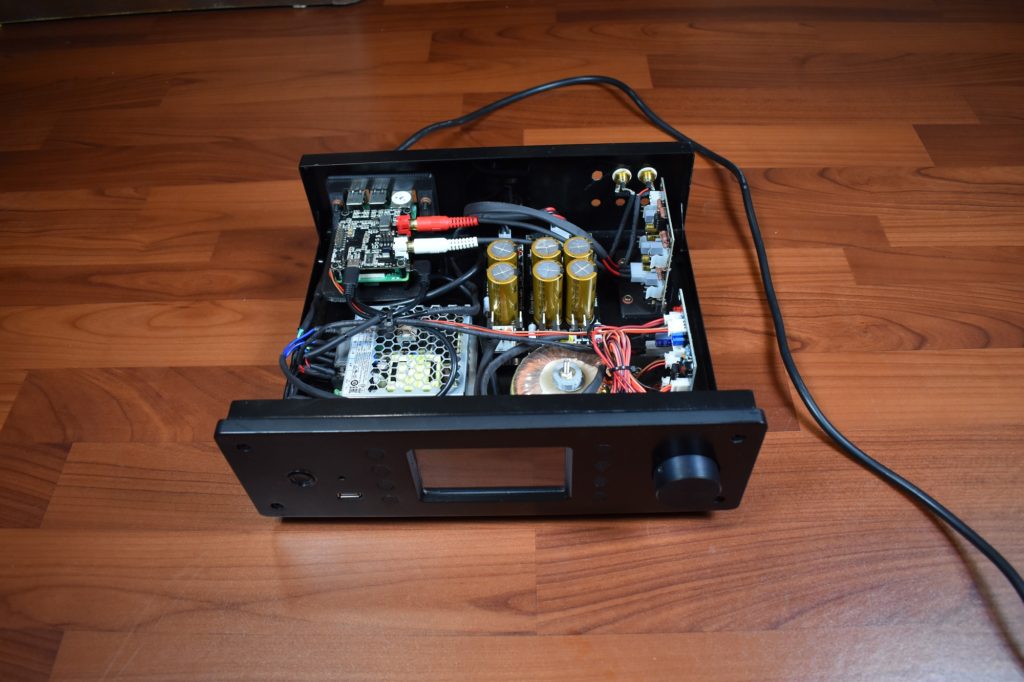
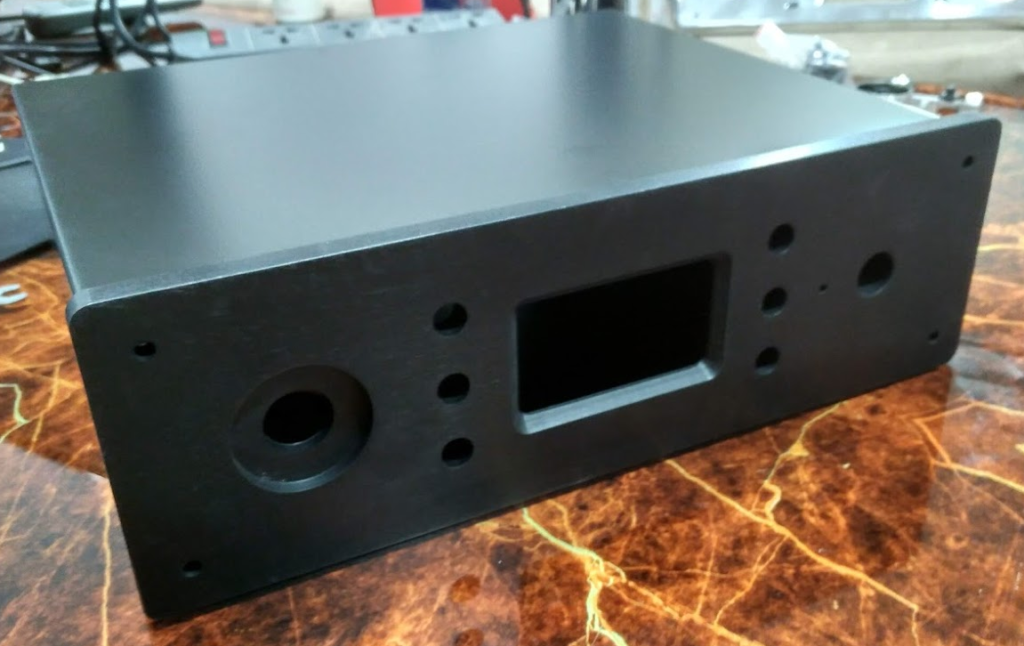
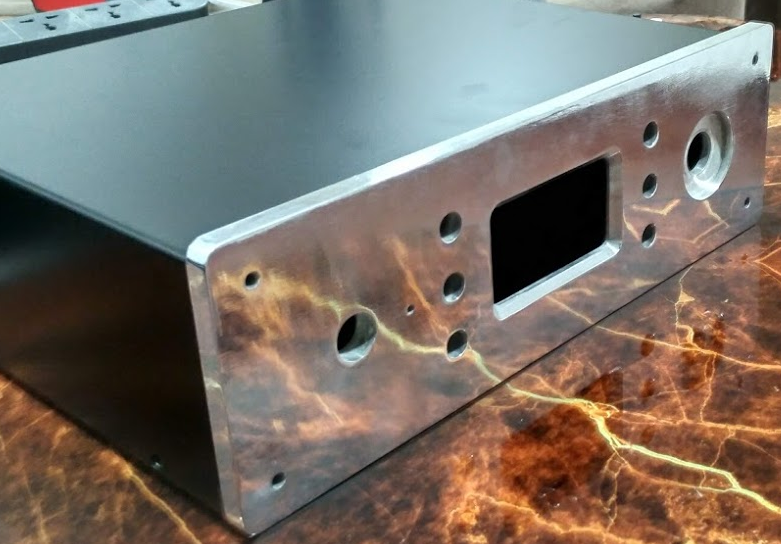
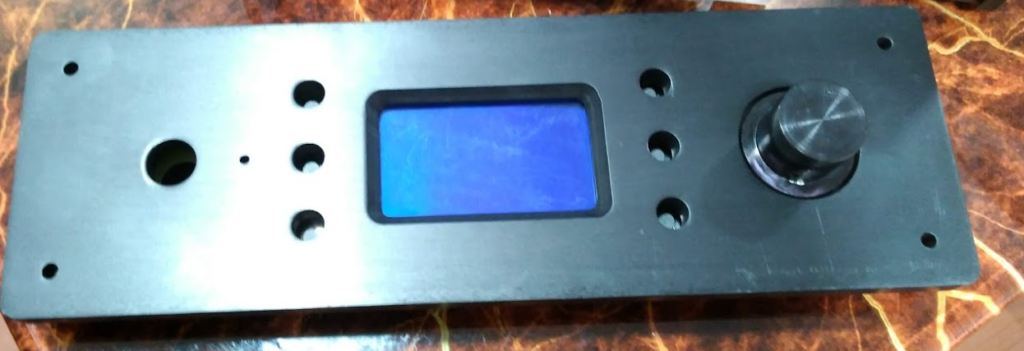
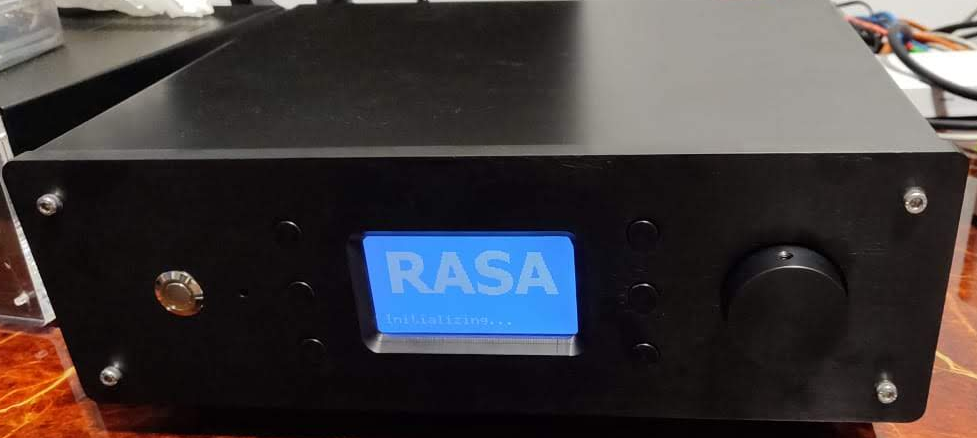
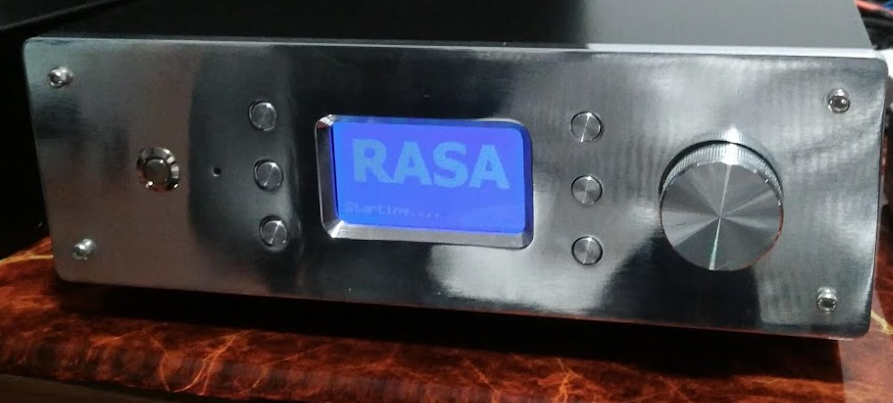
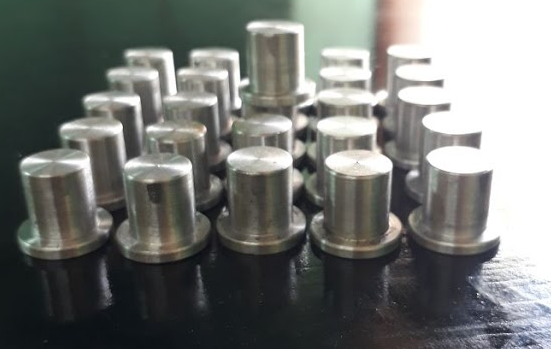
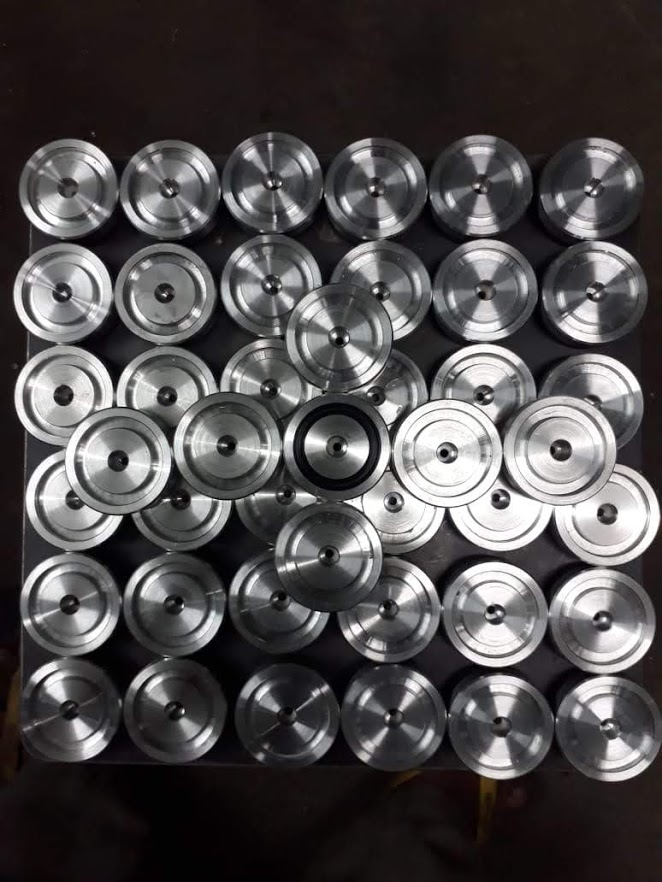
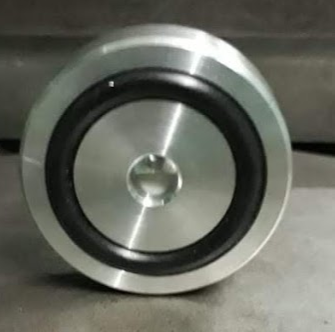
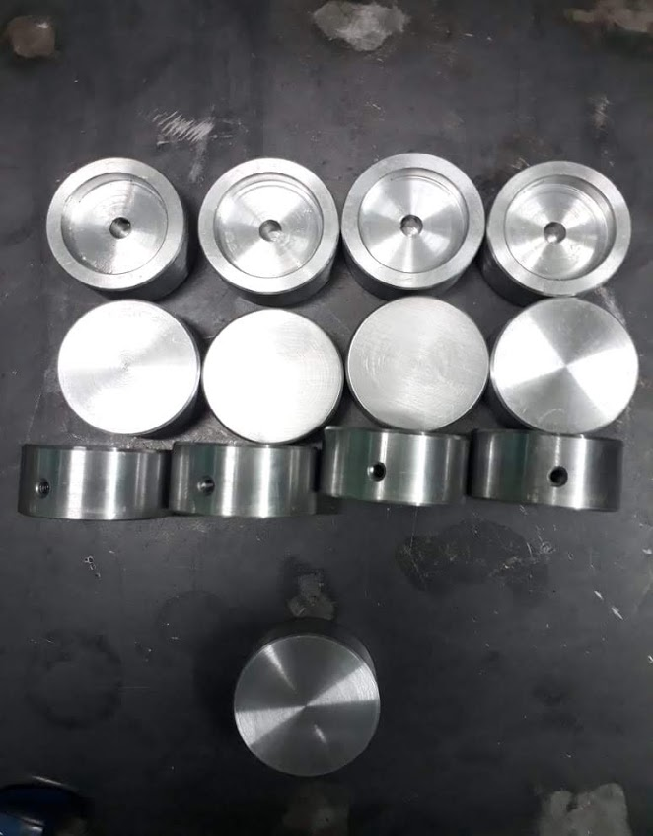
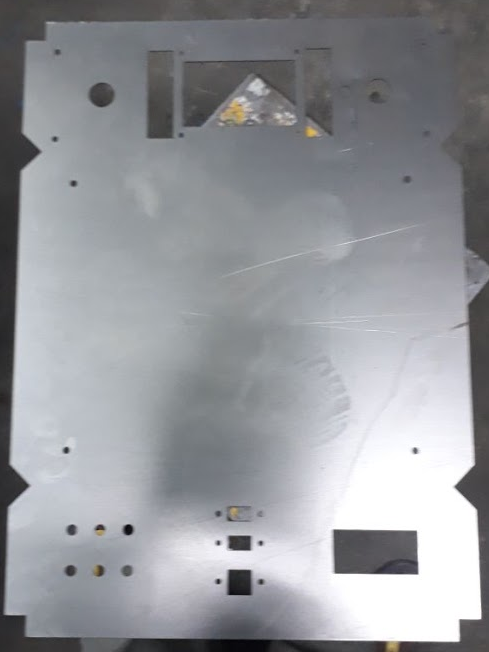
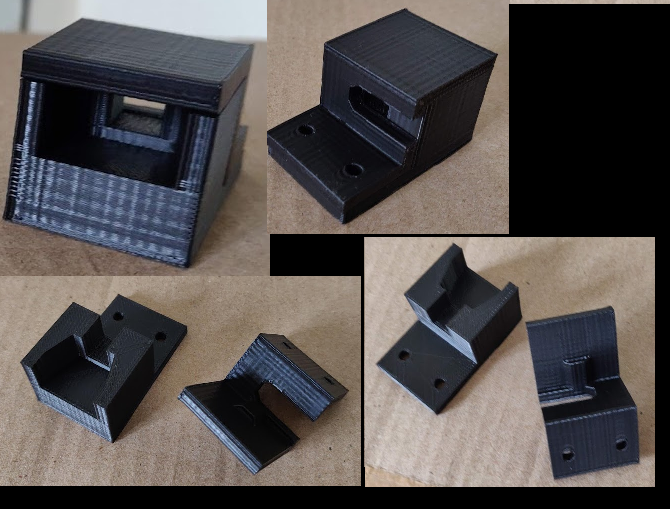
After trying various options we settled on a 10 mm thick aluminium plate for the front panel. The Chassis would be made from 1 mm steel plate. We went thru many iterations to finally settle on the design that everyone liked.
Here are some of the iterations.
Previous Iterations
How well a system performs depends a lot on how well you feed it, this is true for living organisms , automobiles and electronics. When We started exploring the best way to power our Player, we had to choose between SMPS and Linear power supplies. Linear power supplies use large transformers and an elaborate rectification and filtering circuit which allows the pre and power amps to perform well. Noise in the power supply will eventually trickle into the audio signal and will become audible. For example if there is a 100mv power supply ripple noise in the power supply on a 1v Peak to Peak audio signal that is 10% of the signal and will get amplified by the power amplifier just as much as the audio signal.
The advantages of Switch mode power supplies is that they are small and efficient so for a given amp rating, the power supply is much smaller. The downside is that it is pretty noisy.
On the other hand linear power supplies can be very quiet but if the current requirement
is large then we need large heavy transformers and big filtering circuits. Large
transformers come with their own problems of noise and EMI interference in sensitive pre-amp circuits if they are wired too close.
We stared testing and measuring various power supplies to evaluate the performance and found that SMPS was pretty noisy , linear power supplies were quiet but even their noise level started increasing when we increased the current draw (power).
We needed about 5v 3 amp for the SBC , 5V 50ma for the DAC and about +/- 15 100ma for the preamp. We initially wanted to use a single linear power supply but found that whenever the SBC’s power consumption increased when WIFI was active or when a large file was being downloaded, it increased the noise floor of the Linear Power supply. This introduced the noise into our pre-amp circuits.
So we decided to use two power supplies one for SBC and one for the DAC and the Preamp, we ended up using two transformers one with a 5A rating and one with a 1A rating, this created additional headaches of EMI HUM noise from the transformers. So we decided we needed a simpler solution.
Solution:
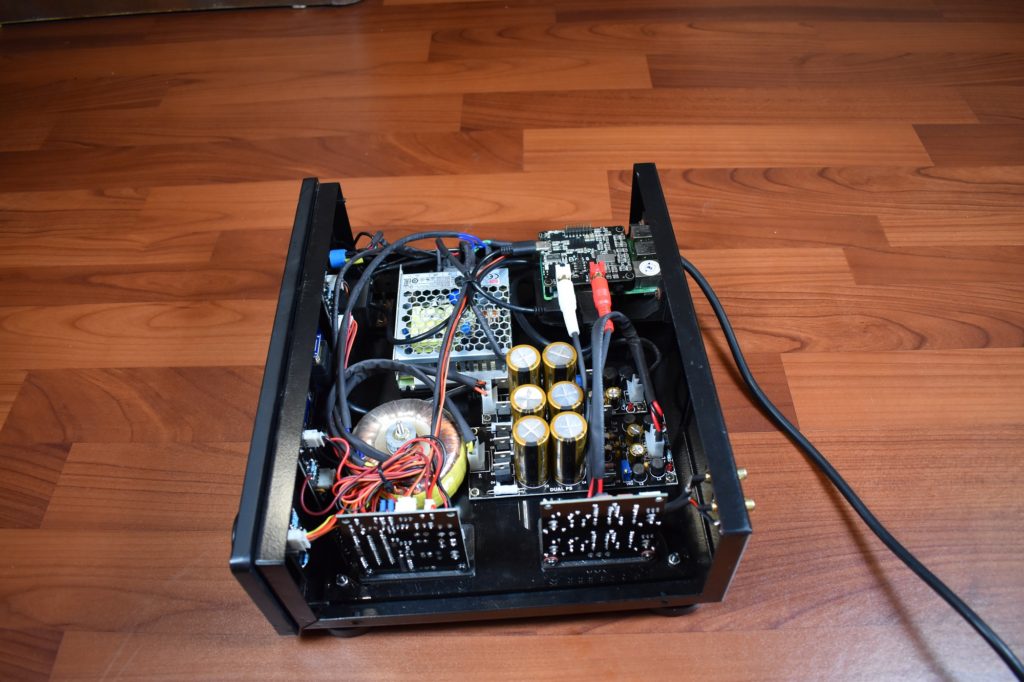
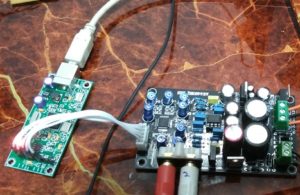
We are using a 5v 10A SMPS for the SBC, MCU for Remote, Front panel,
protection circuits, Input and speaker Switcher Relays,where the audio signal never travels.
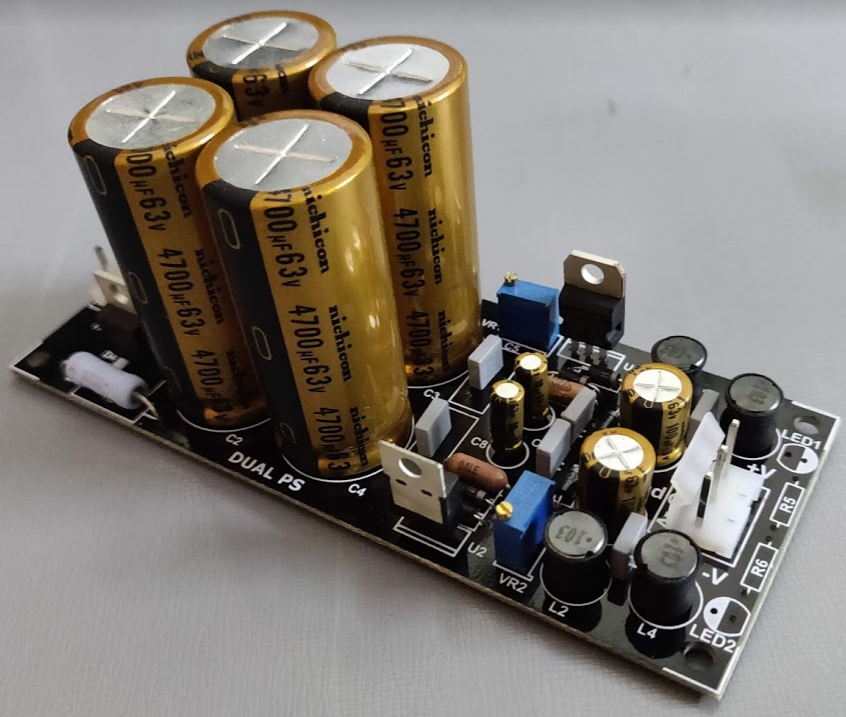
We have a separate Linear power supplies with a torroidal transformer to supply power for the DAC and the Preamp. Thiese power supplies have CRC filter ,CLC filters and large power caps to ensure extremely low noise (less than 5mv and full power draw).
We have taken extreme care to ensure the transformers are as far away as possible from our sensitive audio circuits.
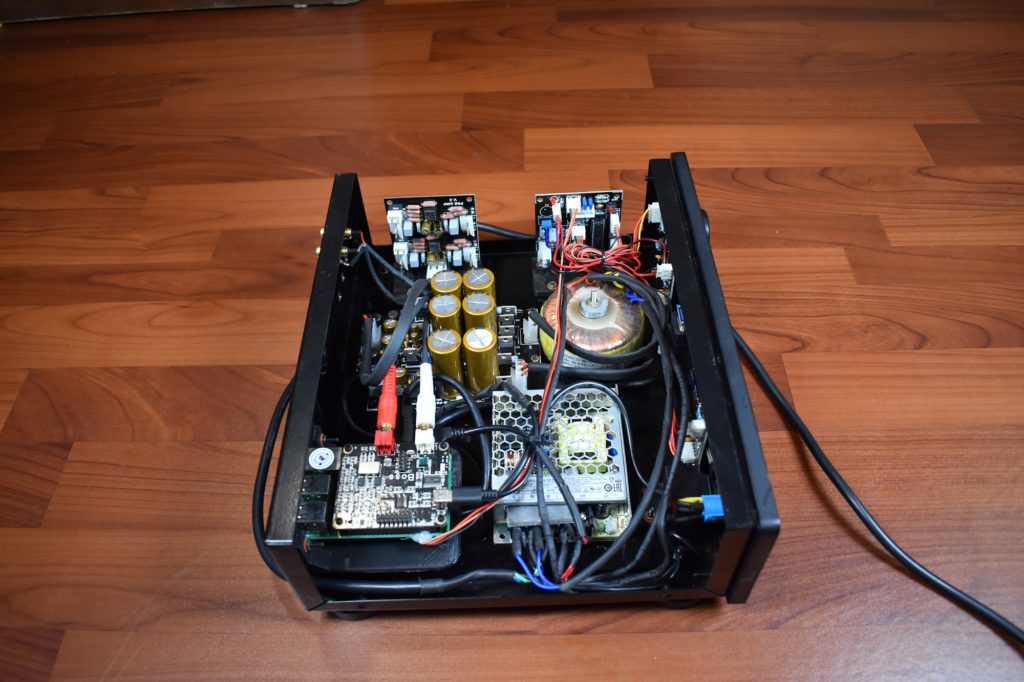
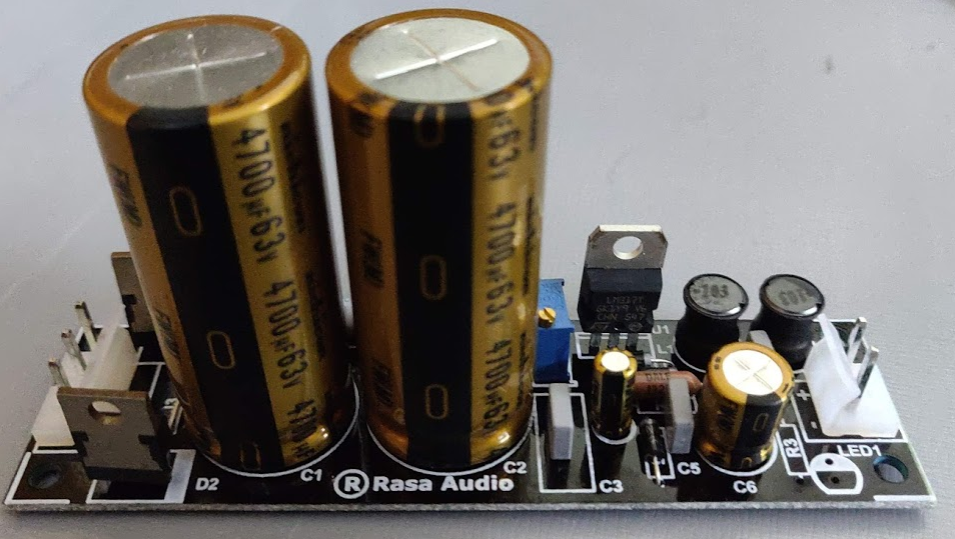
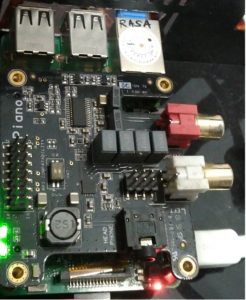
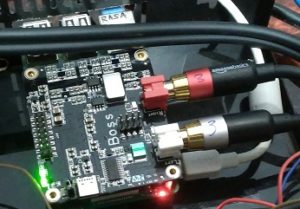
This is the Power supply board for the DAC with +5V
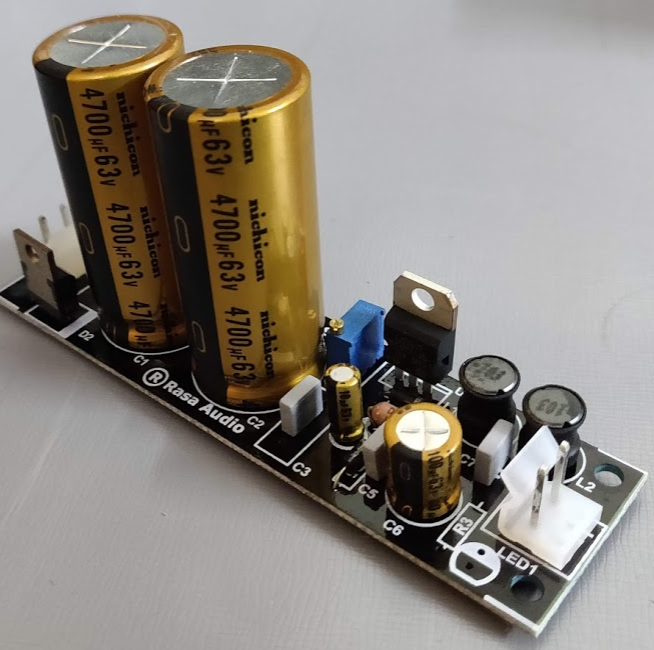
This is the +12 / 0 / -12 Supply for the Preamp. We can adjust the voltage up to +/- 18 V based on the opamps used.
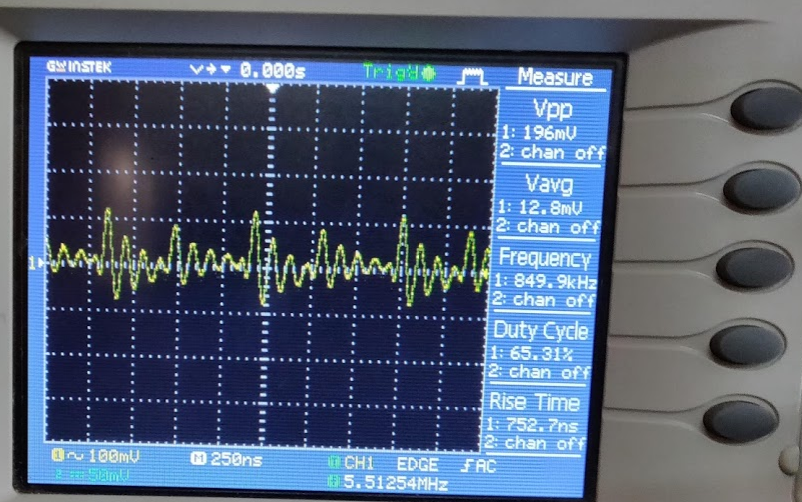
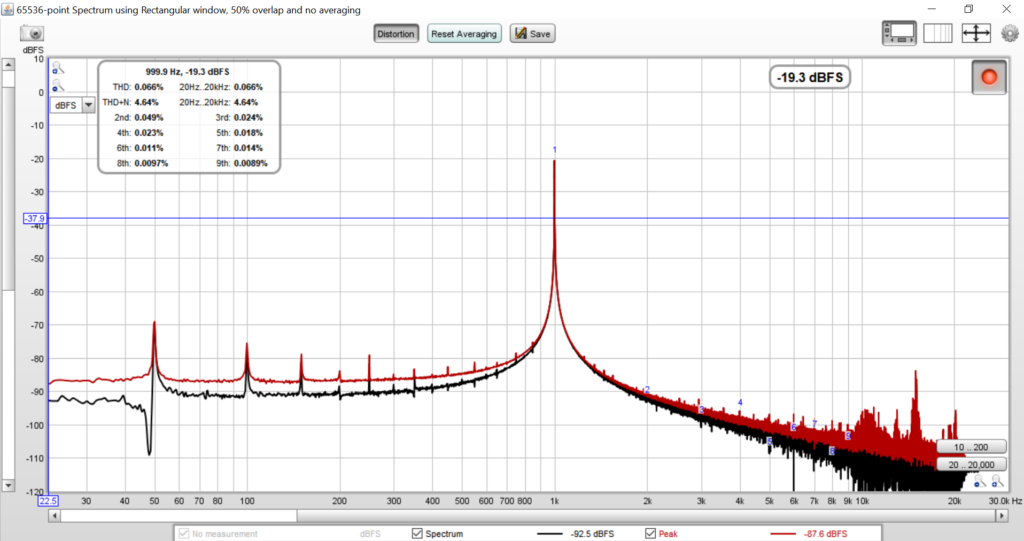
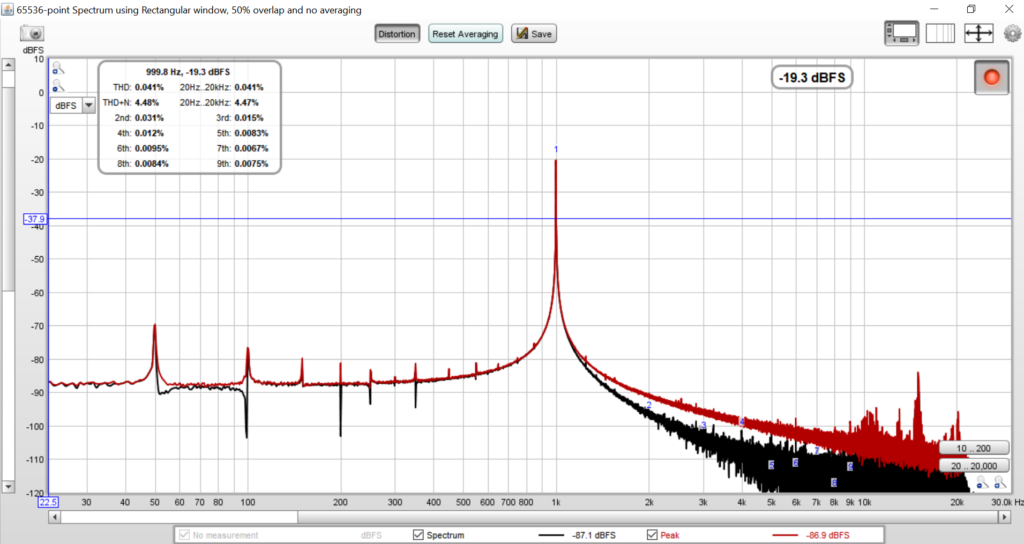
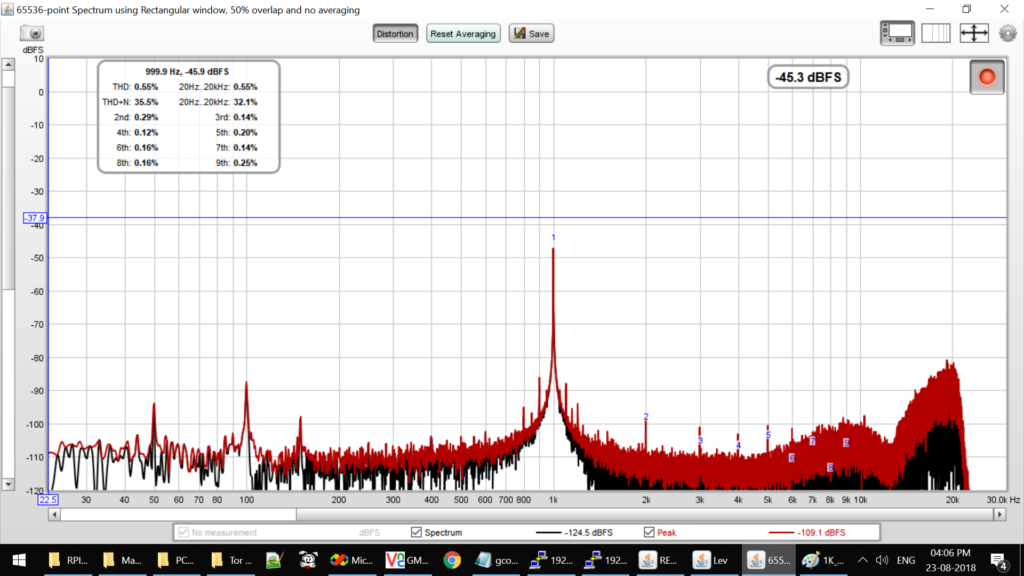
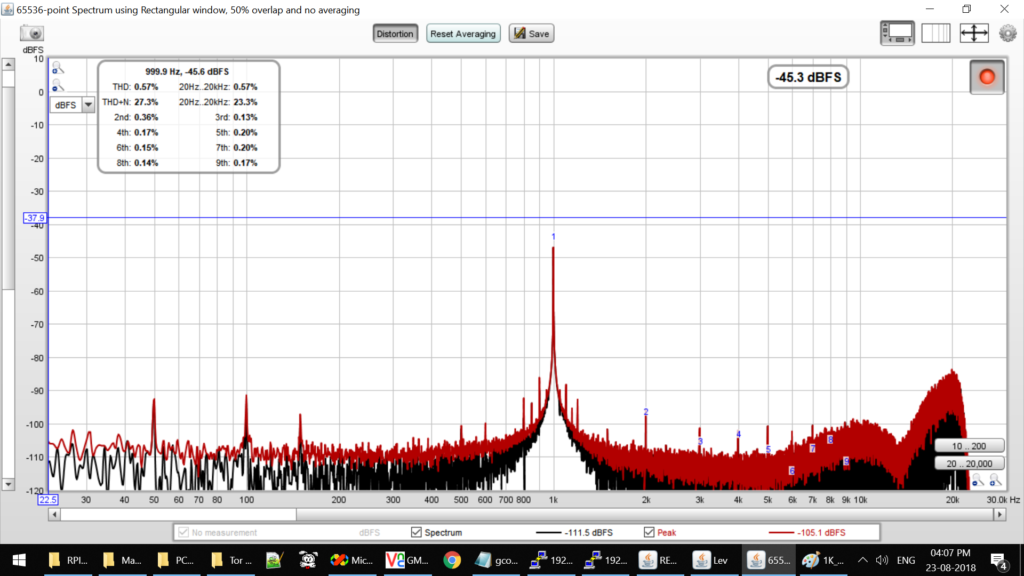
Here we can see the measurements , This is the Noise in SMPS, this about 216mV . The frequency displayed is of the switching frequency of the SMPS.
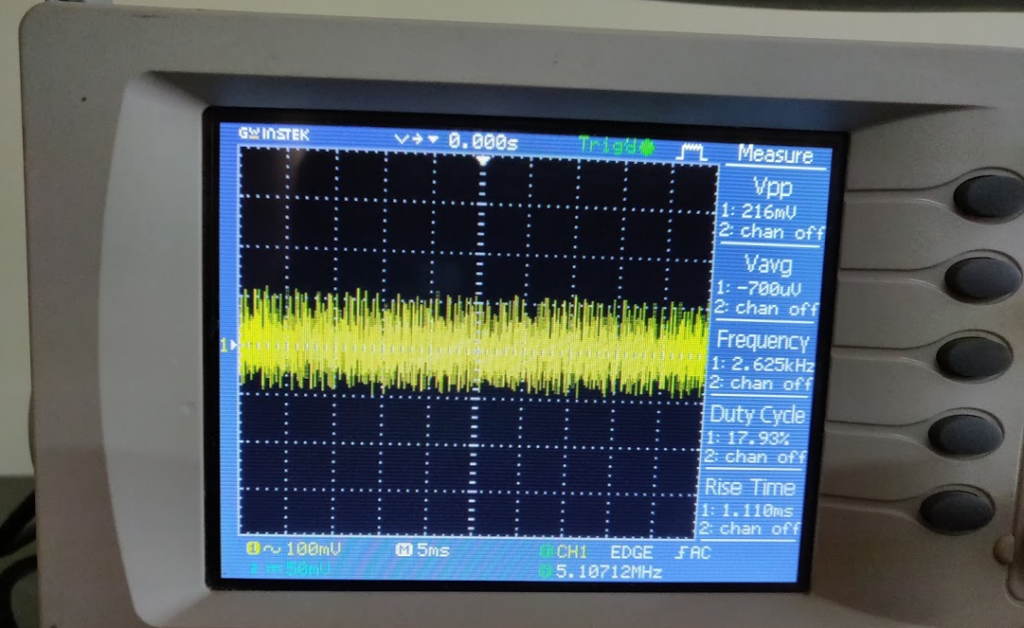
Closer Look at the Waveform (250nS).
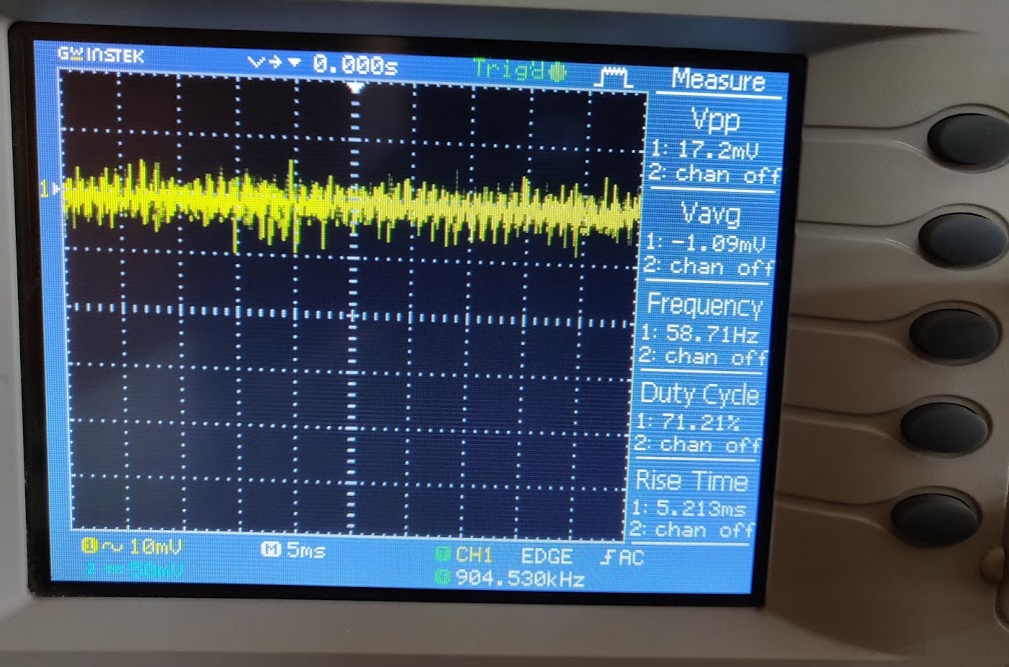
This is using a Linear PSU where the Noise is reduced and is around 17.2mV. and you can see the frequency is more closer to the AC Supply Freq.
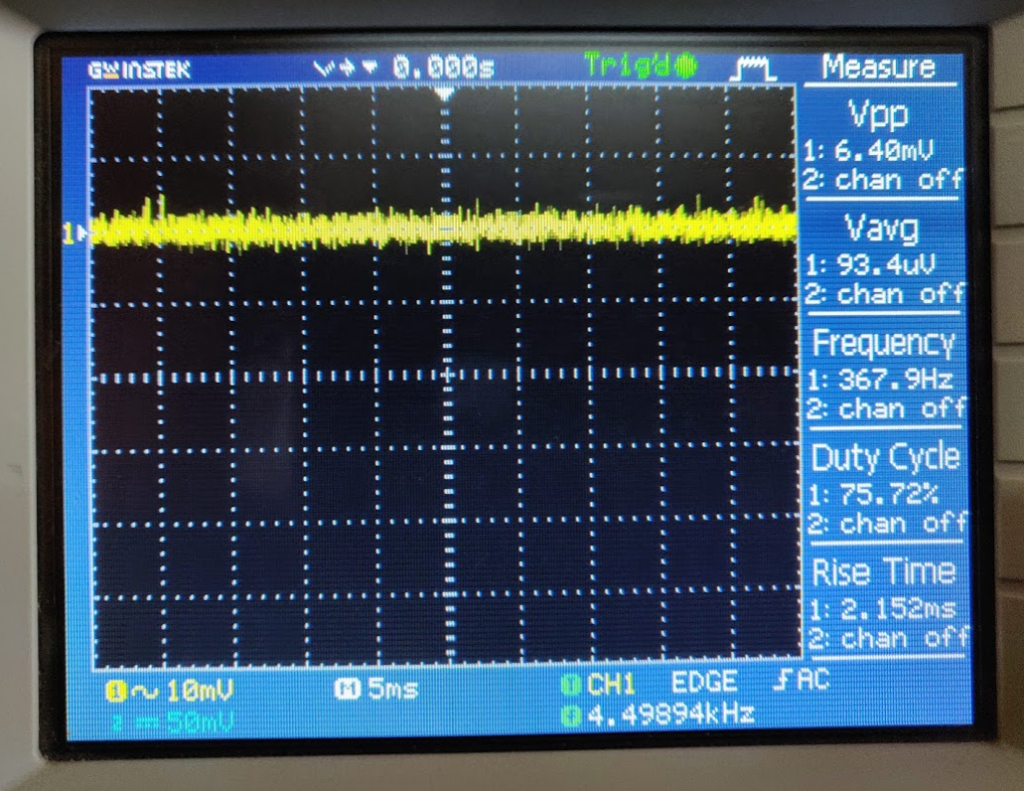
This is the Noise level after CRC and CLC Filters. at just 6.4mV.
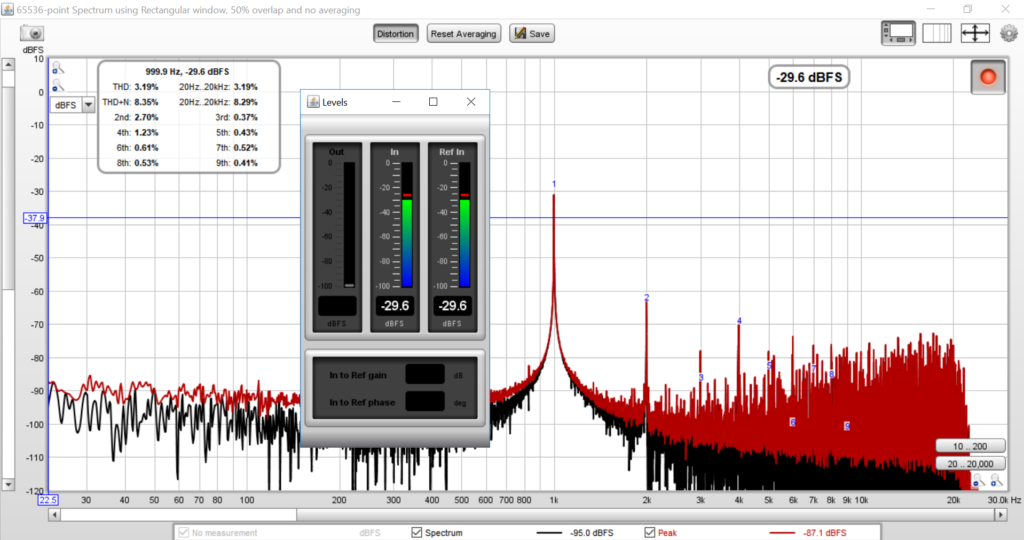
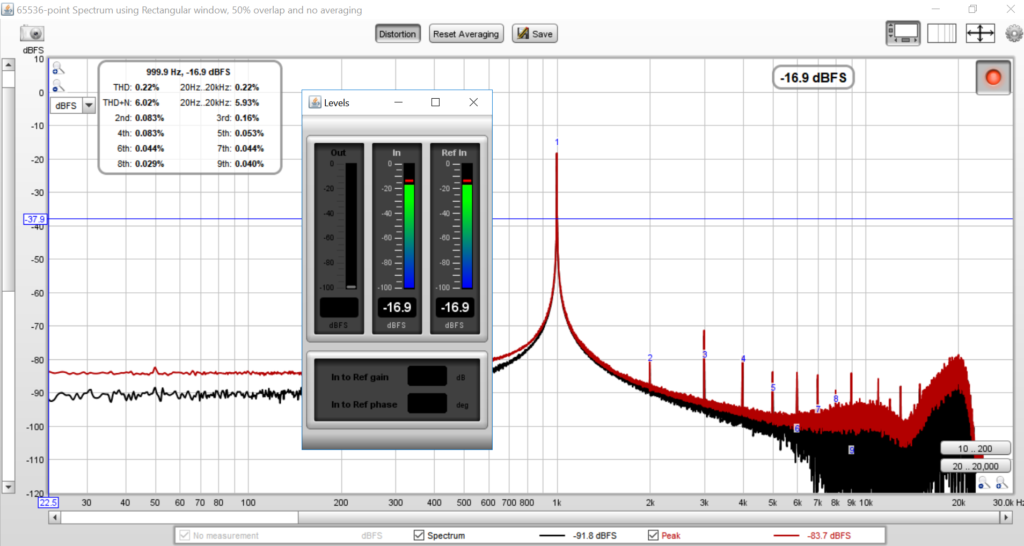
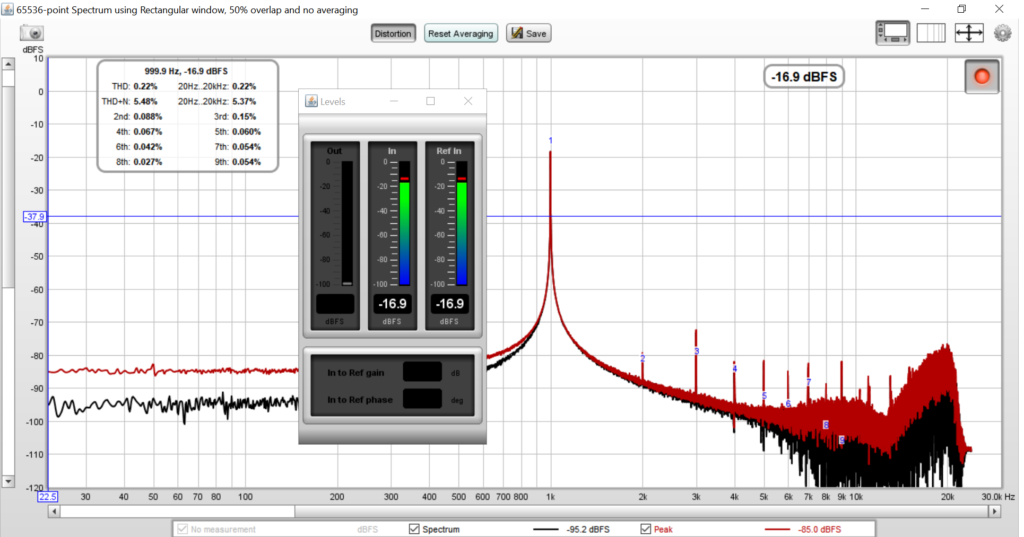
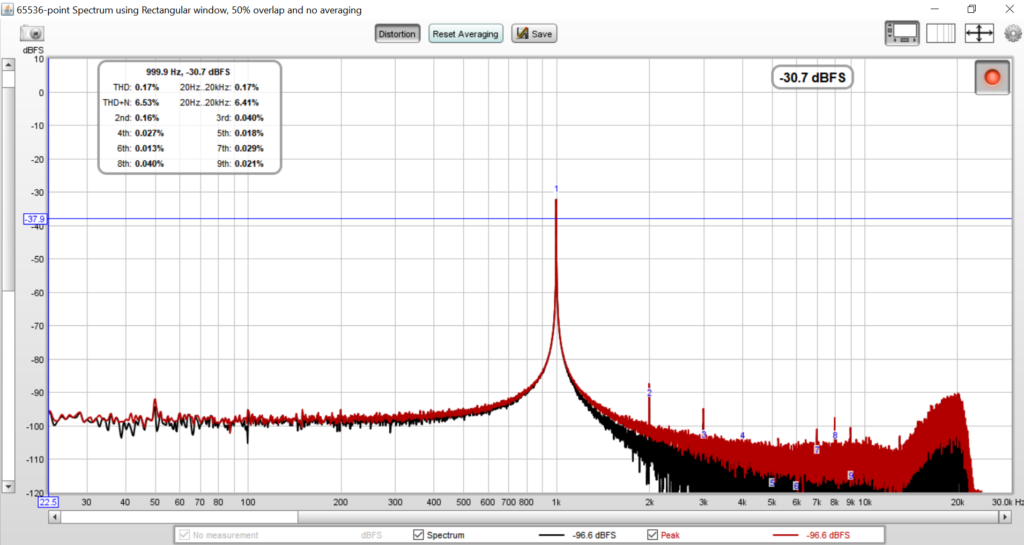
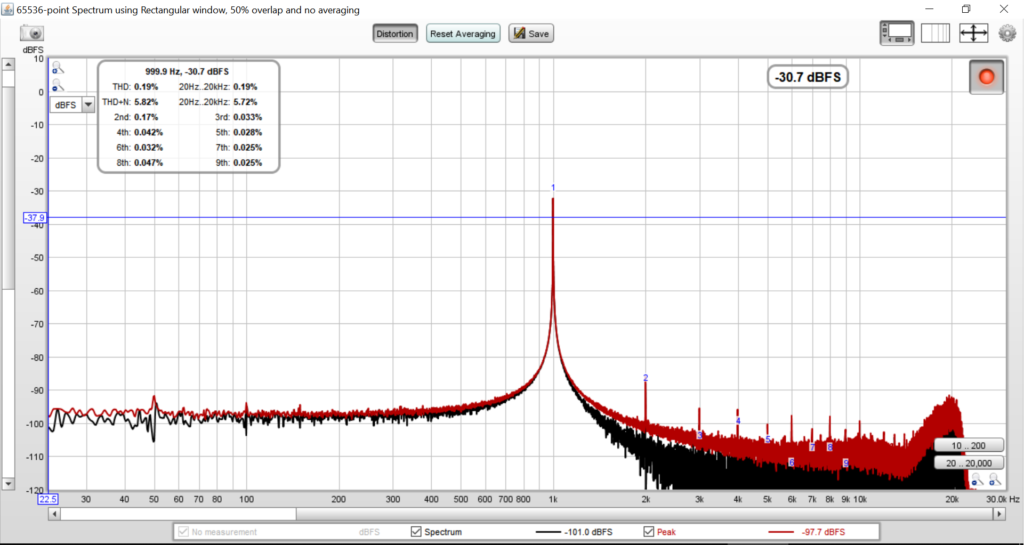
To evaluate the performance of various DACs and AMPs we decided to measure them. Our Measurements are not extremely accurate,but accurate enough to give us relative performance numbers in our setup so that we could make an informed decision. We knew the manufactures had provided the numbers but we wanted to ensure that we chose the right combination for our player.
RPI Board Direct
RPI_DIRECT_1K_16bit_48Khz
PCM5122 DAC
1K_16bit_48Khz_PCM_SIMPLE
1K_16bit_44Khz_PCM_SIMPLE
1K_16bit_44Khz_SLAVE
1K_16bit_48Khz_SLAVE
1K_16bit_44Khz_Master
1K_16bit_48Khz_Master
ESS ES9028
1K_16bit_44Khz_ESS
1K_16bit_48Khz_ESS
AK_4490
1K_16bit_44Khz_AK_4490
1K_16bit_48Khz_AK_4490
Once we finalized the SBC the next important thing was the DAC. Choosing a DAC was not as easy as choosing the SBC, it is very subjective selection process. DAC Sound quality changes between DAC chips and Analog front ends and some are liked by some and some are hated, So we had quite a complex task ahead of us.
We took a non scientific approach of doing listening tests with people from all age groups and backgrounds (audiophile/casual/ipod listeners). We played music from all genres like Rock ,Pop ,Classical, Ilayaraja , AR Rehman etc and got their feed back.
The DACs we tested were
Burr Brown PCM PCM5122 in Slave Mode. (Allo Piano )
PCM5122 Based Master DAC (BOSS Allo)
Low Cost PCM5102a
ESS ES9018K2M
Impressions.
PCM Dacs were smoother and warmer.
The best sounding PCM DAC was the Allo BOSS.
The Piano and the PCM Module did not sound as good on
Hires and 44.4 FLAC files. For MP3 it sounded good enough.
The BOSS DAC had the warmth and depth we were looking for without compromising on the clarity. It was also non fatiguing.
ESS DAC had the best hi frequency resolution , the highs were very clear
and crisp but was fatiguing after a few songs. The younger listeners hated it
since they were very sensitive to the Highs and thought it sounded too harsh.
We could tame the harshness with the analog filters. The high freq characteristic is something we have seen in other ESS DAC like the SABRE DAC from Youlong. ESS felt like it had some unfiltered HF artifacts.
AK DAC This had the best audio quality but needed I2S input with clock which the RPI3 did not have so we used a XMOS USB to I2S converter to get the I2S. This DAC had the warmth ,clarity and had the best tonal reproduction.
So we decided to go with the Allo BOSS for our Rasa Player and AK4490EQ for our reference player.
We at Rasa decided that we will use two Platforms one for Affordable
RASA Player and one for High End Reference Player. Our needs were a powerful SBC hardware with good Software stack.
Features we identified for our affordable player included
1) Powerfull Quad or higher core SBC ( 1.2 gHz or higher ) with atleast 1GB RAM.
2) Ethernet port.
3) USB port.
4) I2S Port.
5) Mature OS and Distro.
6) Good Software support.
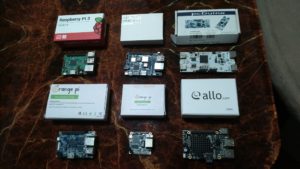
We Evaluated the following SBCs for the RASA Player.
Allo Sparky
This had the same form factor as RPI and had good performance.
Had I2S and the RAM we required, but we were not comforable with the
maturity of the Software stack.
Orange PI (PC)
Good inexpensive boards but unsatisfactory sofware support
Banana PI
They are similar to Orange PI and use somewhat similar SOCs
from Allwinner on the low end ones.
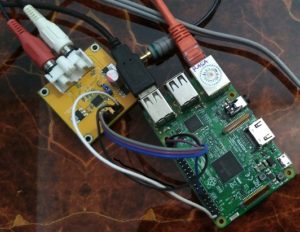
Raspberry PI 3
We decided to go with this because it was inexpensive with
very good software support and a vibrant community. It had I2S for
connecting to DACs. Companies such as allo have good Reclockers and
DACs.
For RASA we will be using the I2S on RPI3 to drive the DAC
directly. With a custom analog section built using high quaity
discrete components. We would be using low tolerence thru hole
components for all passives. For the DAC we have selected
the PCM 5102a . There is a blog article on how we chose this
DAC here.
We Evaluated the following SBCs for the Reference Player.
Features we identified for our High End player included
1) Powerfull Quad or Octa Core SBC ( 1.6 gHz or higher ) with atleast 2GB RAM.
2) Ethernet port.
3) USB port.
4) I2S Port (Optional).
5) Mature OS and Distro.
6) Good Software support.
BananaPI M3
We decided to go with this because it had an Octacore chip
with 2GB ram. The cores automatically throttle down when not in use
but do get very hot when you push them. We had to comeup with a good
heat sink to allow all the cores of the M3 to run at full speed for
long times. If the heat sink was not adequete, the cores would hit the
thermal protection and scaled down their speed (clock frequency).
When we used it continually we started noticing issues like boot problems when USB DAC is inserted .
Getting to compile the kernel was painfull to say the least.
The compiled kernel will not boot , so after contless hours of researching
we found that you have to use an older version of GCC to compile.
The GCC that comes with the SDK wont do.
RPI3
Not enough horsepower to run our Remote Browser Player.
Intel Atom Motherboards.
Too big and too power hungry , would require a ATX SMPS
or noisy DC to DC converters.
Intel NUC Board
We finally decided to use this since it was compact and easy to power.
In the player we decided to use the USB to I2S XMOS solution.
As XMOS reclocks the data based on the sample rate (44.1 or 48) we found
this to be a better solution than to use I2S directly from the SBC. We
use high quality clocks on the XMOS board to ensure very low jitter.
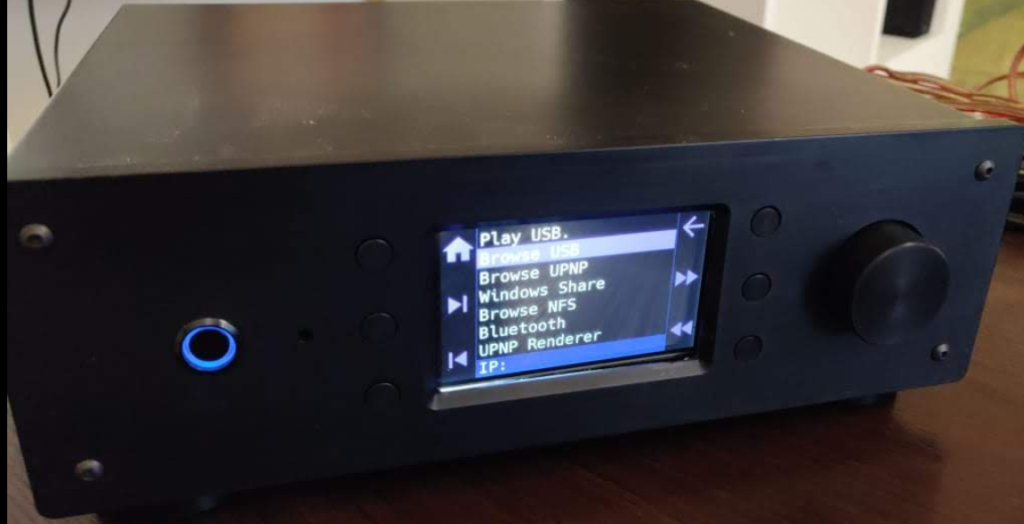
After adding DLNA Controller Support , we have added the SMB (Windows Sharing) and NFS Share support for playing files from NAS. We found that this is actually faster and easier than using DLNA servers since there is always a indexing lag from the time you copy the files to the server to the time it actually appears on the player. With SMB or NFS files appear instantly and it much faster to browse. We can always use folders to organize our collection.
Would you want to wait 10 minutes for the player to be ready before playing a file ?
Well the answer is NO.
When a disk is inserted in to most players , they start indexing. A process where they go thru each and every file in each and every folder and read the ID3 tags in them like album artist genre etc. This is time consuming and prevents the users from playing music right after inserting the disk. If a player tries to do this in the background it will interfere with the player trying to read the disk to play the file. You will have two processes contending for the disk access, the player to play the file, the Indexer which is making the disk read each and every file. The caching mechanism in the OS is useless for the indexer since it reads one file only once so the OS needs to keep dumping its cache. This is the reason you will see the Drives continually run during the indexing process.
We made a clear decision not to index the tags for USB disks, so when you insert the disk you can play files on them instantly. Only once process access the disk and that is the player. We assume most disks users insert will already have well organized folders that they are familiar with. We would still display the tags when the song is played, just not when the disk is inserted. This saves so much time and frustration when playing files from the USB disks.